
How to organize your Laravel application with Public Site and Administrative Panel.
Many projects have different parts of their structure, like a blog for example.
You have the administrative part, where for example you will manage your posts, newsletters, schedule new posts, and so on.
But your admin panel and the public part of your reader's access are totally different, they depend on totally different middleware, repositories, controllers, filters, cache, and views.
To have a better organization of these standards I created this organizational structure that works for my daily life but feels free to adapt the structure to your needs.
Throughout this article, we are going to use the structure of a blog as an example.
Separating views
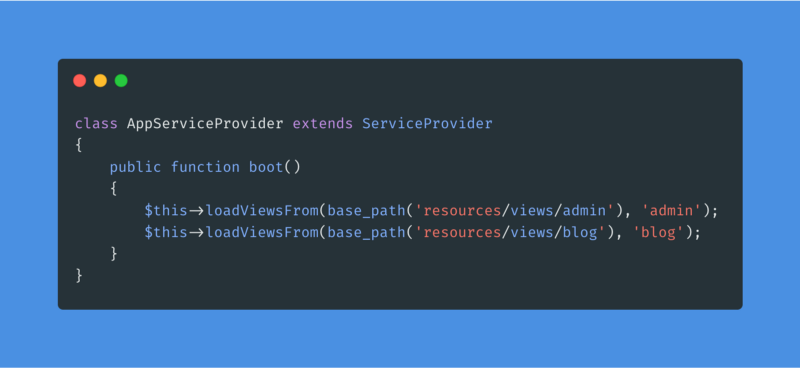
The first thing I do is create an "alias" for the "views/admin" and "views/blog" view paths as in the example below:
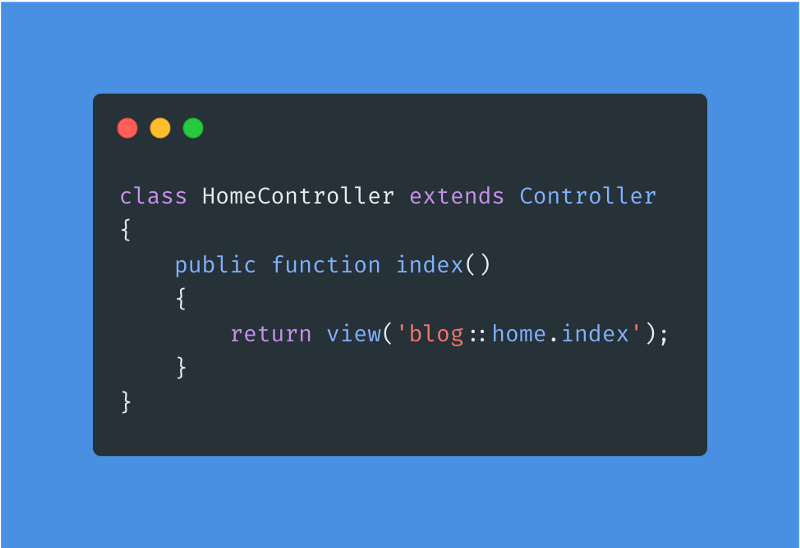
This way you will be able to use these "alias" when necessary, as in the example below, where "blog::path_to_view" is equal to "views/blog/path_to_view"
Namespace structure
Another thing I always do that helps me a lot in the organization is to separate controllers into different namespaces, like “Controllers/Admin” and “Controllers/Blog”.
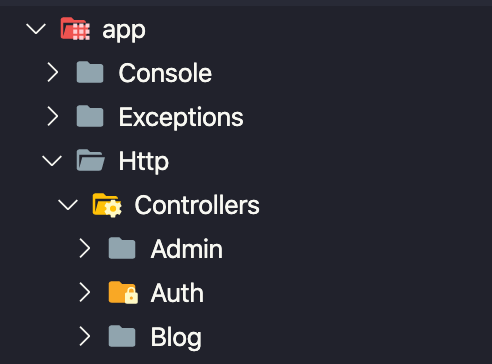
With this structure, your project is organized and your code isolated in the respective namespaces.
Bonus
If you want to be even more organized, you can even break your route file in two.
Instead of just keeping the “routes/web.php” file you can split it into “routes/admin.php” and “routes/blog.php”.
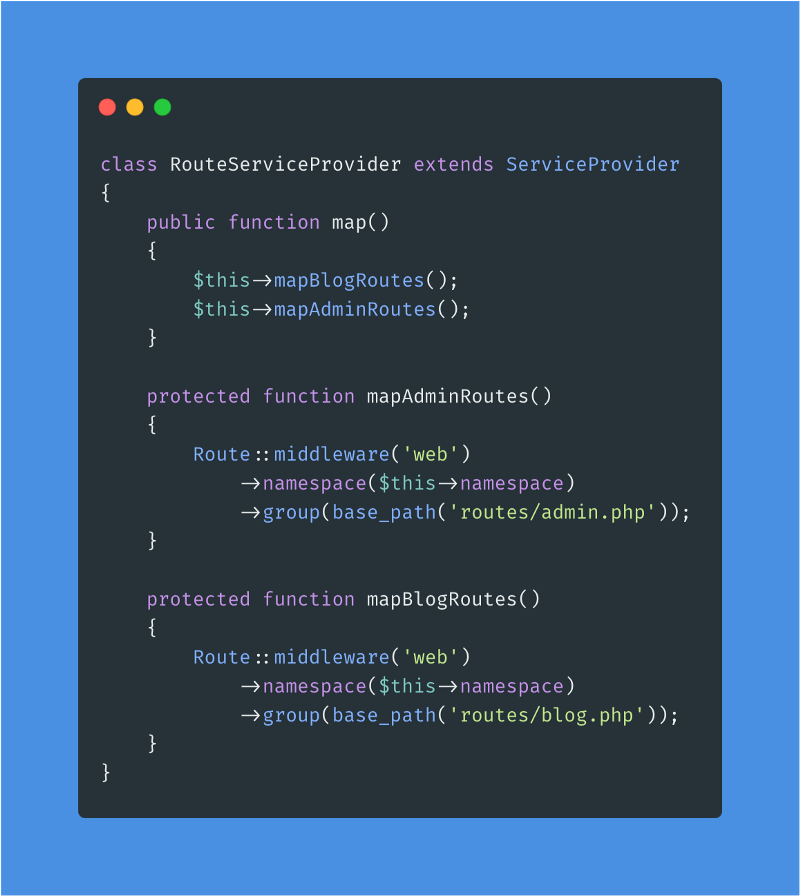
For that, create the two files “routes/admin.php” and “routes/blog.php”, notice that I'm already putting the correct namespaces and prefixes in the route group as well.


To stop loading only the “routes/web.php” file and start reading the “routes/admin.php” and “routes/blog.php” files, you need to adjust your RouteServiceProvider as follows.
Okay, now your project will be much more organized and easier to maintain.
If you have any suggestions for improvement or criticism of this structure, leave them in the comments below for discussion.
Important:
You will need to run: composer dump-autoload for the changes to take effect. This organization tutorial works from Laravel 5.0 to 7. x